The PowerShell profile is the unsung hero of your shell, a secret weapon that can transform your mundane tasks into an efficiency and fun excercise.
If your PowerShell usage is confined to executing one-liners or running scripts from shared folders within the outdated ISE, you’re missing out on a world of customization and efficiency.
This is the first part of a two-part series where we’ll dive deep into the world of profile customization. Get ready to discover a treasure trove of tips and tricks that’ll elevate your PowerShell experience to legendary status. ✨
🔧 Essential Setup
This guide is optimized for PowerShell 7. If you’re still clinging to an older version, I highly recommend upgrading to the latest and greatest for the optimal experience.
Optional Pro Tip: For Windows users, consider installing the Windows Terminal or any other modern terminal that boasts rich ANSI support. This will enhance the visual appeal and functionality of your PowerShell environment. Mac and Linux users typically have this capability built into their terminals already (mostly).
📝 Crafting Your PowerShell Profile
If you’re a PowerShell profile newbie, no worries! We’ll start from scratch. Just fire up your terminal and execute the following code:
if (!(Test-Path -Path $PROFILE)) {
  New-Item -ItemType File -Path $PROFILE -Force
}
# Open in Default editor, choose notepad if you are prompted to select one
Invoke-Item $PROFILE
This nifty snippet will create your profile file if it doesn’t already exist and open it in your default text editor. Easy peasy!
🧩 Building Blocks of Your Profile
To keep your profile tidy, maintainable, and efficient, I’ve categorized the components into distinct groups. While you don’t have to incorporate every single element, understanding the possibilities and loading mechanisms is key to unleashing the full potential of your PowerShell profile.
Let’s explore each component in detail. In the next article (Part 2 of 2), I’ll guide you through assembling these building blocks to create a powerhouse profile that’s tailored to your unique needs.
🎨 Prompt Makeover: Let Your Personality Shine Through
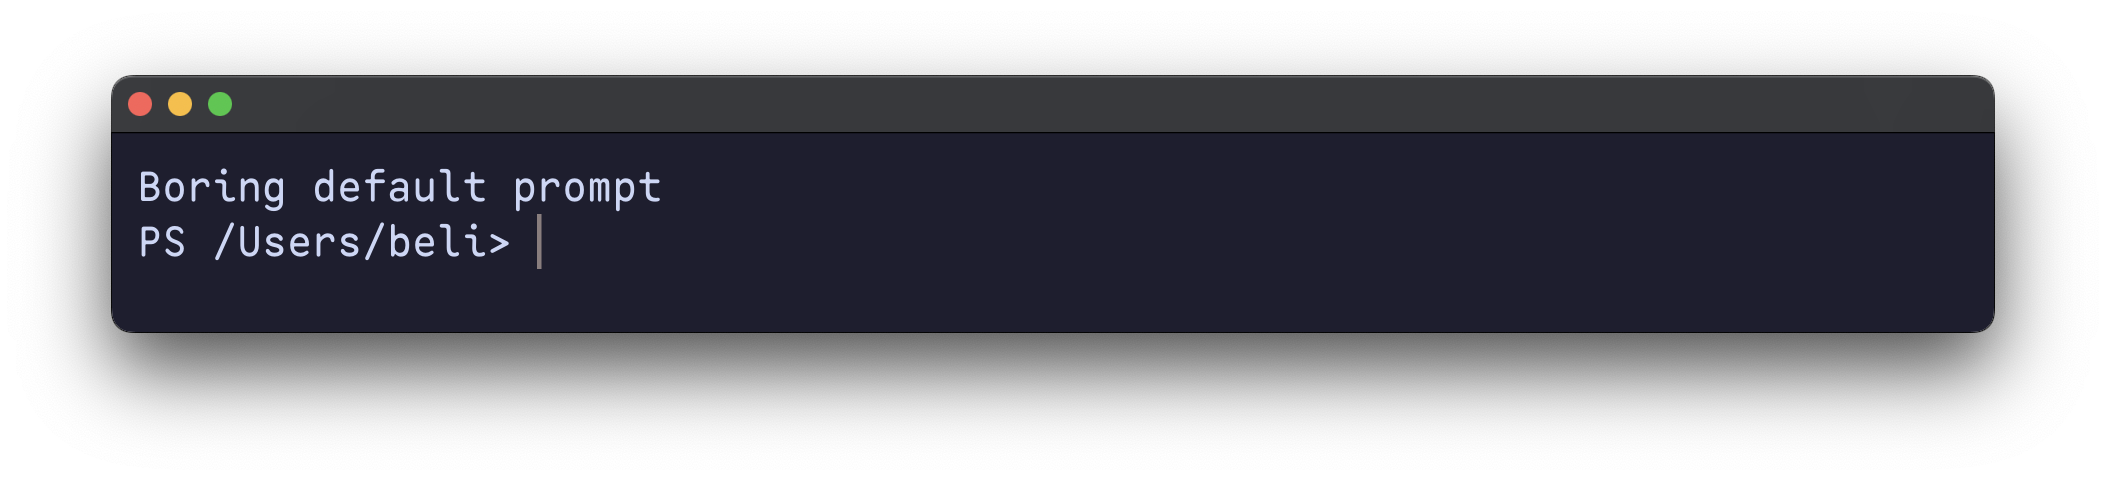
One of the most obvious signs that someone has leveled up their PowerShell game is a personalized prompt. The default prompt might suffice for a quick virtual machine session, but why settle for mediocrity when you can have a prompt that’s as unique as you are?
Below is the basic Default prompt, its not too bad, but we can easily enhance it.
Let’s inject some life into your terminal with this simple yet eye-catching prompt function,
function prompt {
    $curPath = (Get-Location).Path
    $curTime = Get-Date -Format 'HH:mm:ss'
    Write-Host $curPath -ForegroundColor Red -NoNewline
    Write-Host ' :: ' -NoNewline
    Write-Host $curTime -ForegroundColor Blue -NoNewline
    Write-Host ' ⚡' -NoNewline
    return ' '
}
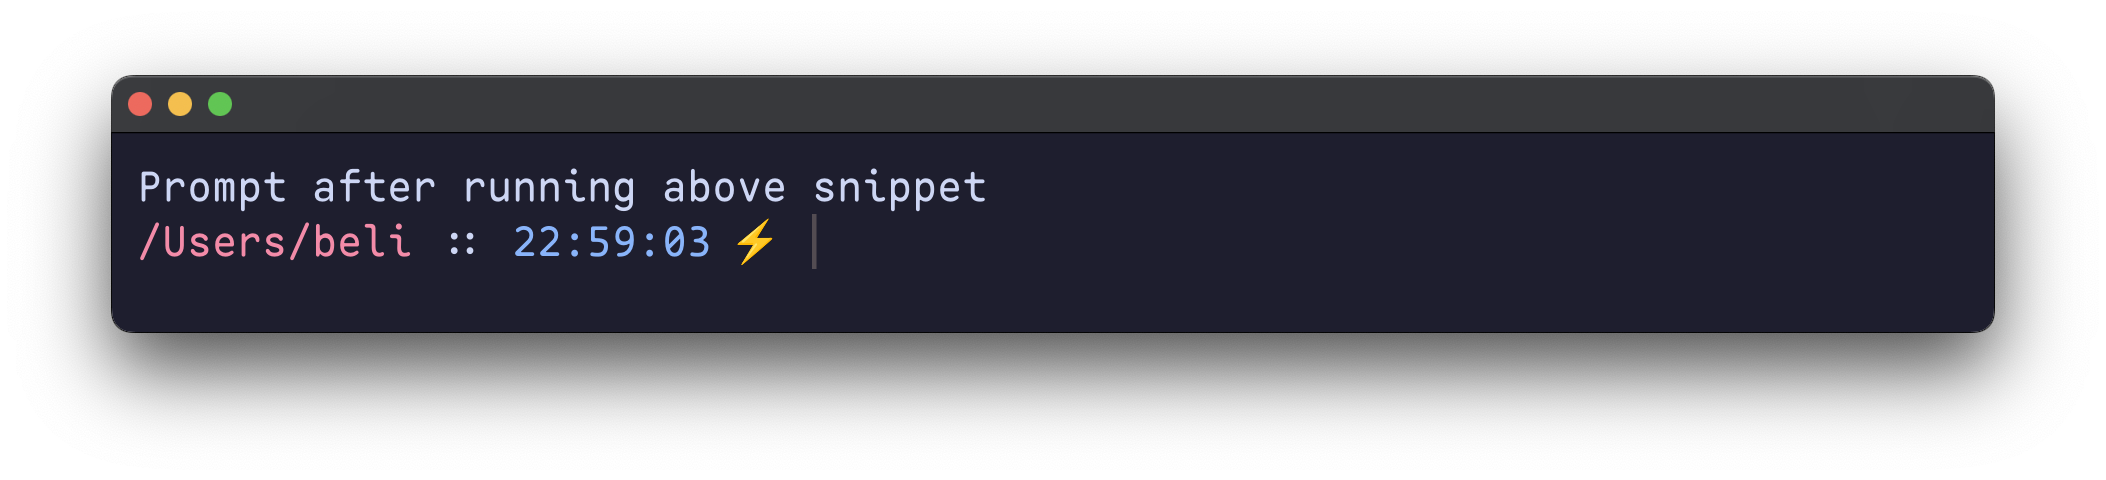
This function replaces the bland default prompt with a stylish colorful prompt with path, time and classic thunder emoji. Feel free to customize and experiment with different prompt and make it truly yours.
Prompt Pro Tip: This is just a taste of the incredible prompt customization possibilities at your fingertips! Dive into Microsoft’s about_Prompts documentation to uncover a wealth of additional options.
If you’re looking for ready-made prompt awesomeness, consider exploring popular modules like Oh My Posh or binaries like Starship. These tools offer a vast array of pre-designed prompts that can instantly elevate your PowerShell style.

Beyond the prompt, you can personalize your PowerShell experience even further by customizing fonts, font sizes, backgrounds, themes, and other visual elements. These settings vary depending on your terminal app and are typically accessible through its configuration or settings page.
🔀 Alias Wizardry: PowerShell Shortcuts
Aliases are the bread and butter of any shell configuration, and PowerShell is no exception. While PowerShell handles aliases in its own unique way (either within functions/scripts or as manual creations), the concept remains the same, create shortcuts to frequently used commands for a smoother workflow.
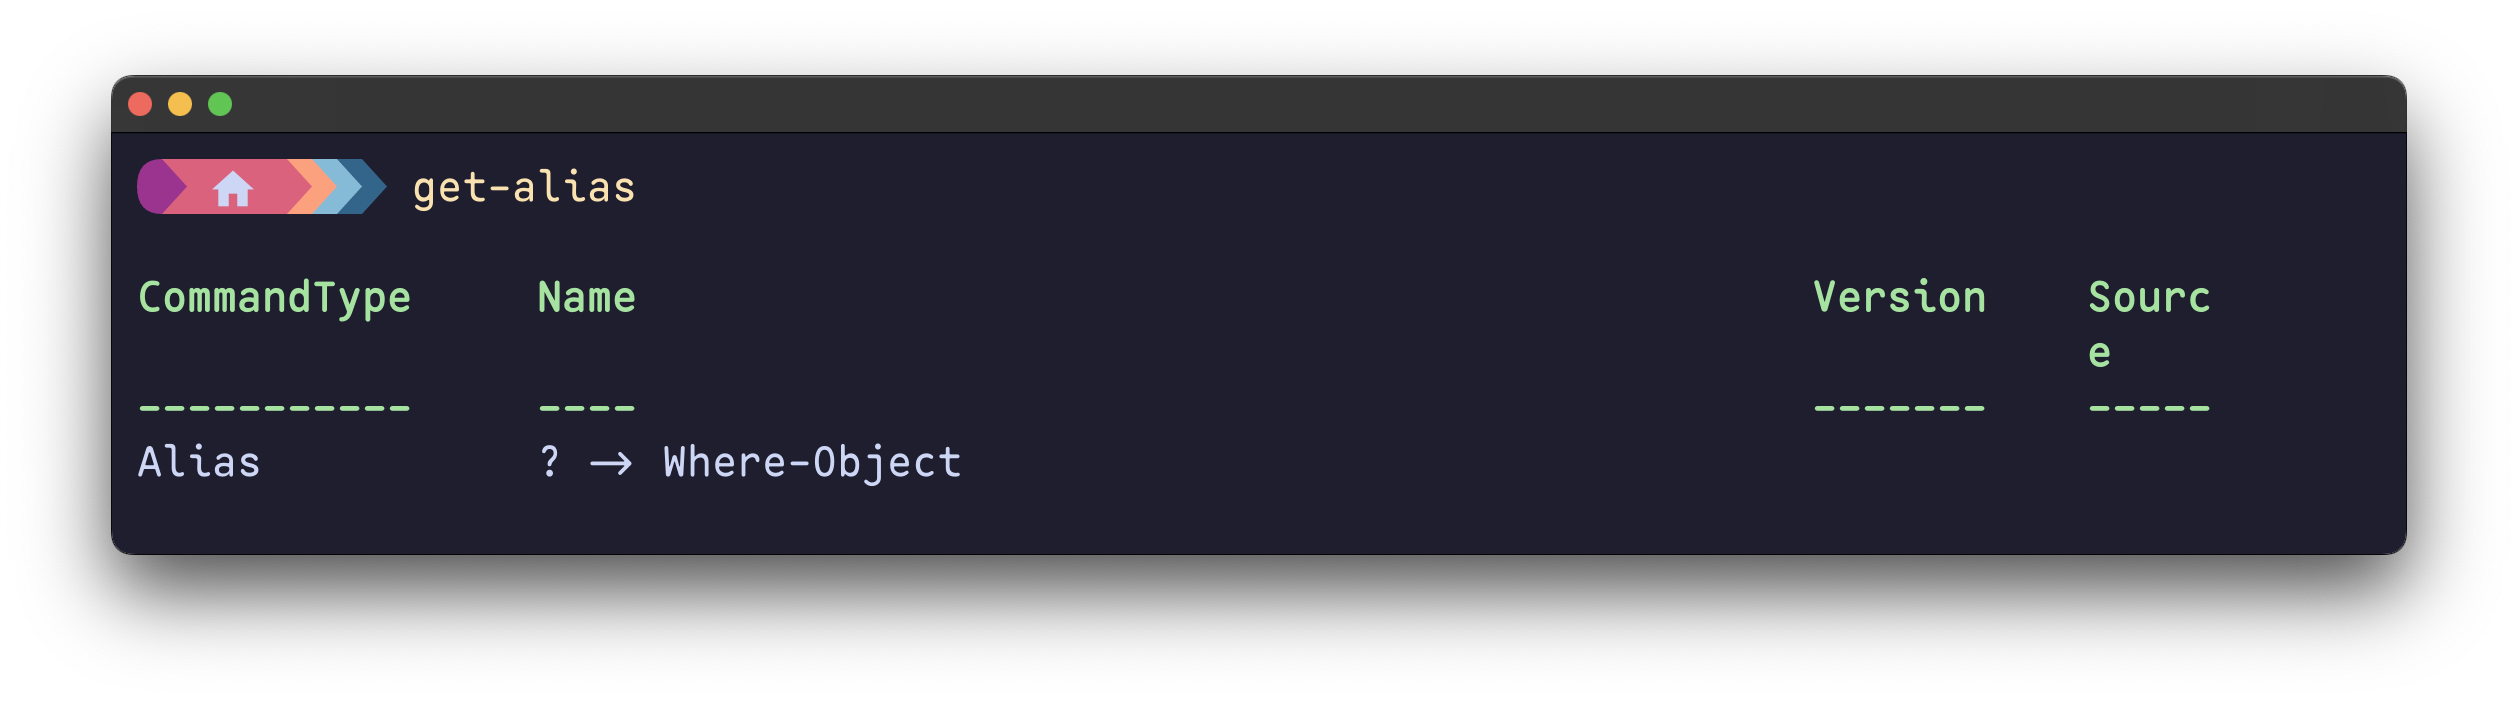
Discovering Existing Aliases
Before diving into custom aliases, familiarize yourself with the built-in aliases that PowerShell provides. Many common Linux-style commands already have aliases defined, so you might discover that the shortcut you need is already at your disposal.
# Get all alias in the current session]
Get-Alias
Creating Your Own Aliases
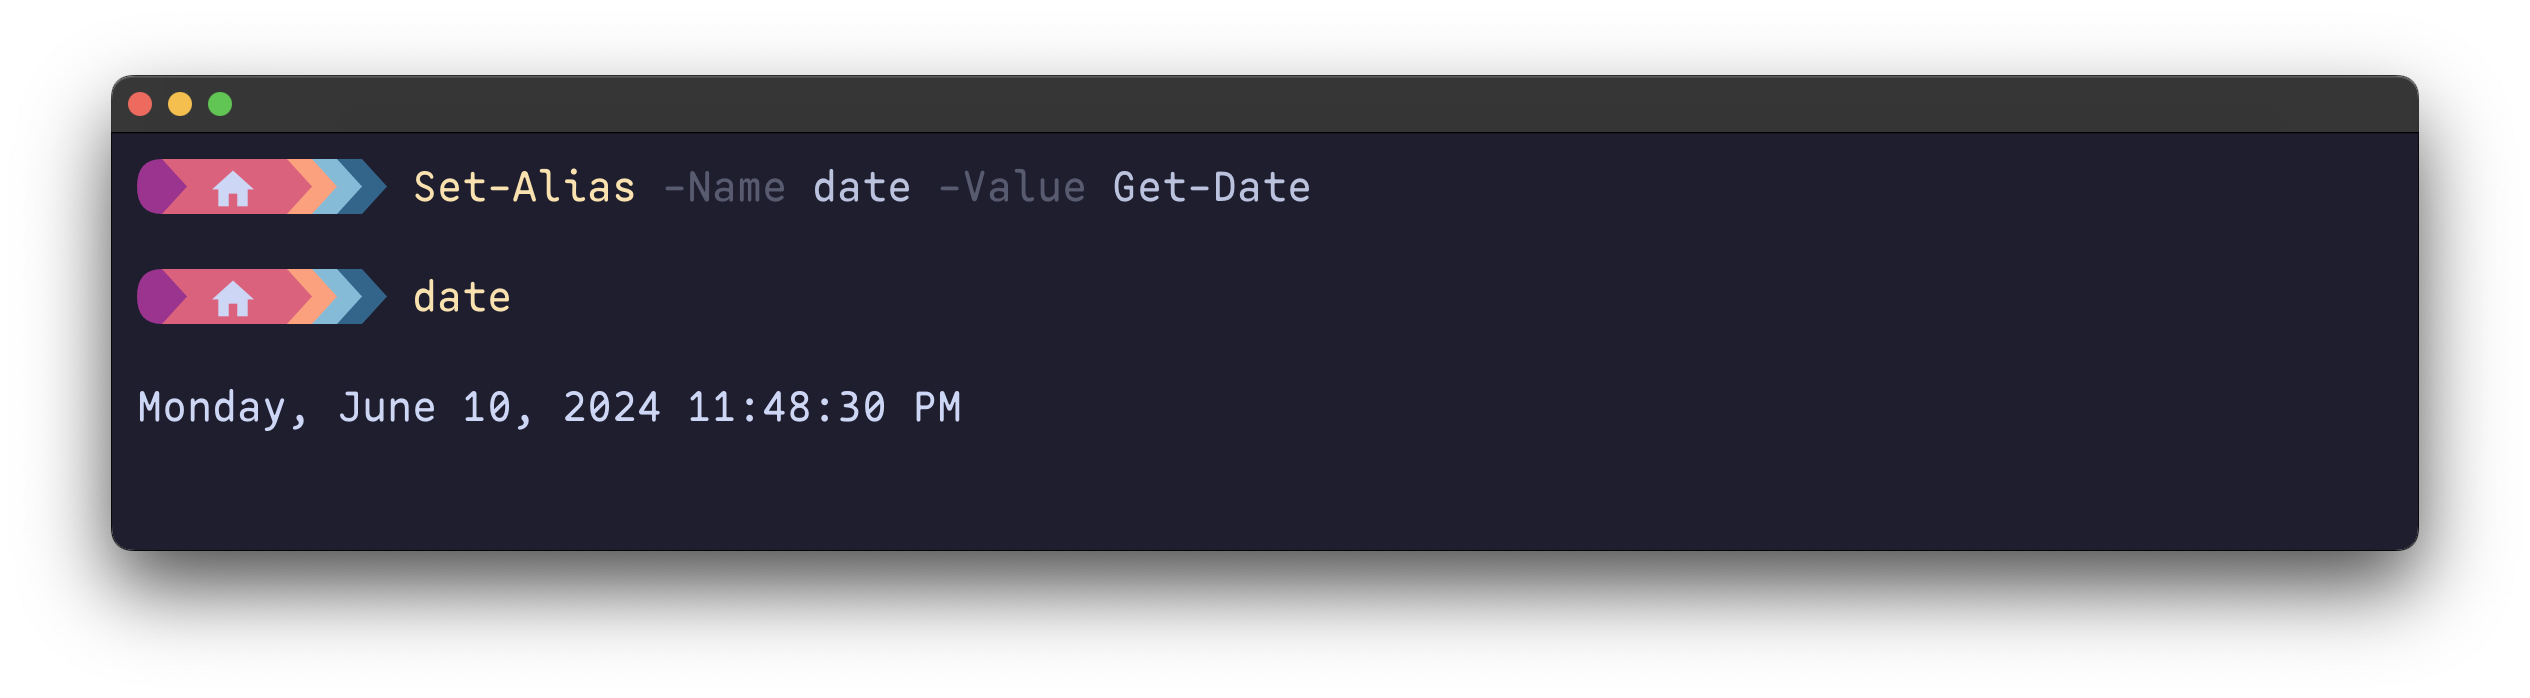
Setting aliases is a breeze with the Set-Alias command. For instance, to create a handy shortcut like date for the Get-Date command, simply execute:
# Set Alias
Set-Alias -Name date -Value Get-Date
Advanced Alias Techniques: Functions as Aliases
But what if you crave a date in a different format, with little more customization that is not offered by native command?
The preferred way is to create a function that wraps into a function, this provides the most customziation options.
function sdate { (Get-Date).ToShortDateString() }
Tab Completion: The Alias Alternative
While aliases are undoubtedly handy for saving keystrokes, I’m a firm believer in the power of tab completion. Luckily, PowerShell has this feature built right in, so there’s no need for any extra plugins. The more you use PowerShell, the more tab completion will become an instinctive part of your workflow.
In the date example, instead of setting an alias, it’s far more efficient to simply type Get-D and hit the Tab key. PowerShell will magically complete the command to Get-Date for you!
This approach not only saves you from memorizing aliases but also empowers you to explore the full range of available commands with ease. It’s a win-win!
Note: Remember, PowerShell is case-insensitive, so typing
get-dateandGet-Dateproduces the same result. I tend to avoid CamelCasing in the terminal, but tab completion swoops in to automatically convert the command to the appropriate case, ensuring my code remains clean and readable.
🌍 Environment Variables: Data Storage
Environment variables are like the multi-purpose tools of your PowerShell Session. They can store a variety of information that can be used to customize your environment, control script behavior, and streamline your workflow. Storing confidential and private information in Env Variable isolates your data from the script. Here are some practical use cases:
- API Keys and Tokens
- Configuration Settings
- Paths
PowerShell allows you to easily set env variable,
$env:TOKEN  = "xyz-token-value"
$env:EDITOR = "nvim"
Depending on your operating system, these variables can operate in system, user, or session contexts. Env variable set in PROFILE is confined to session context.
⚡️ Supercharging with Modules
With the basics in place, it’s time to inject some serious functionality into your shell using external Modules. Most PowerShell modules can be downloaded from PSGallery which has more than 13k unique packages.
Note: Not all packages are build equal, take necessary precautions before you download any packages form external source.
Every module you add to your arsenal unlocks a new dimension of PowerShell capabilities. To kickstart your journey, here are some must-have modules that will instantly elevate your shell game:
- PSReadline: command line editing in the PowerShell console host
- PowerShellGet: Modern module manager
- oh-my-posh: Prompt enhancer
- Terminal-Icons: Show icons for files and folders
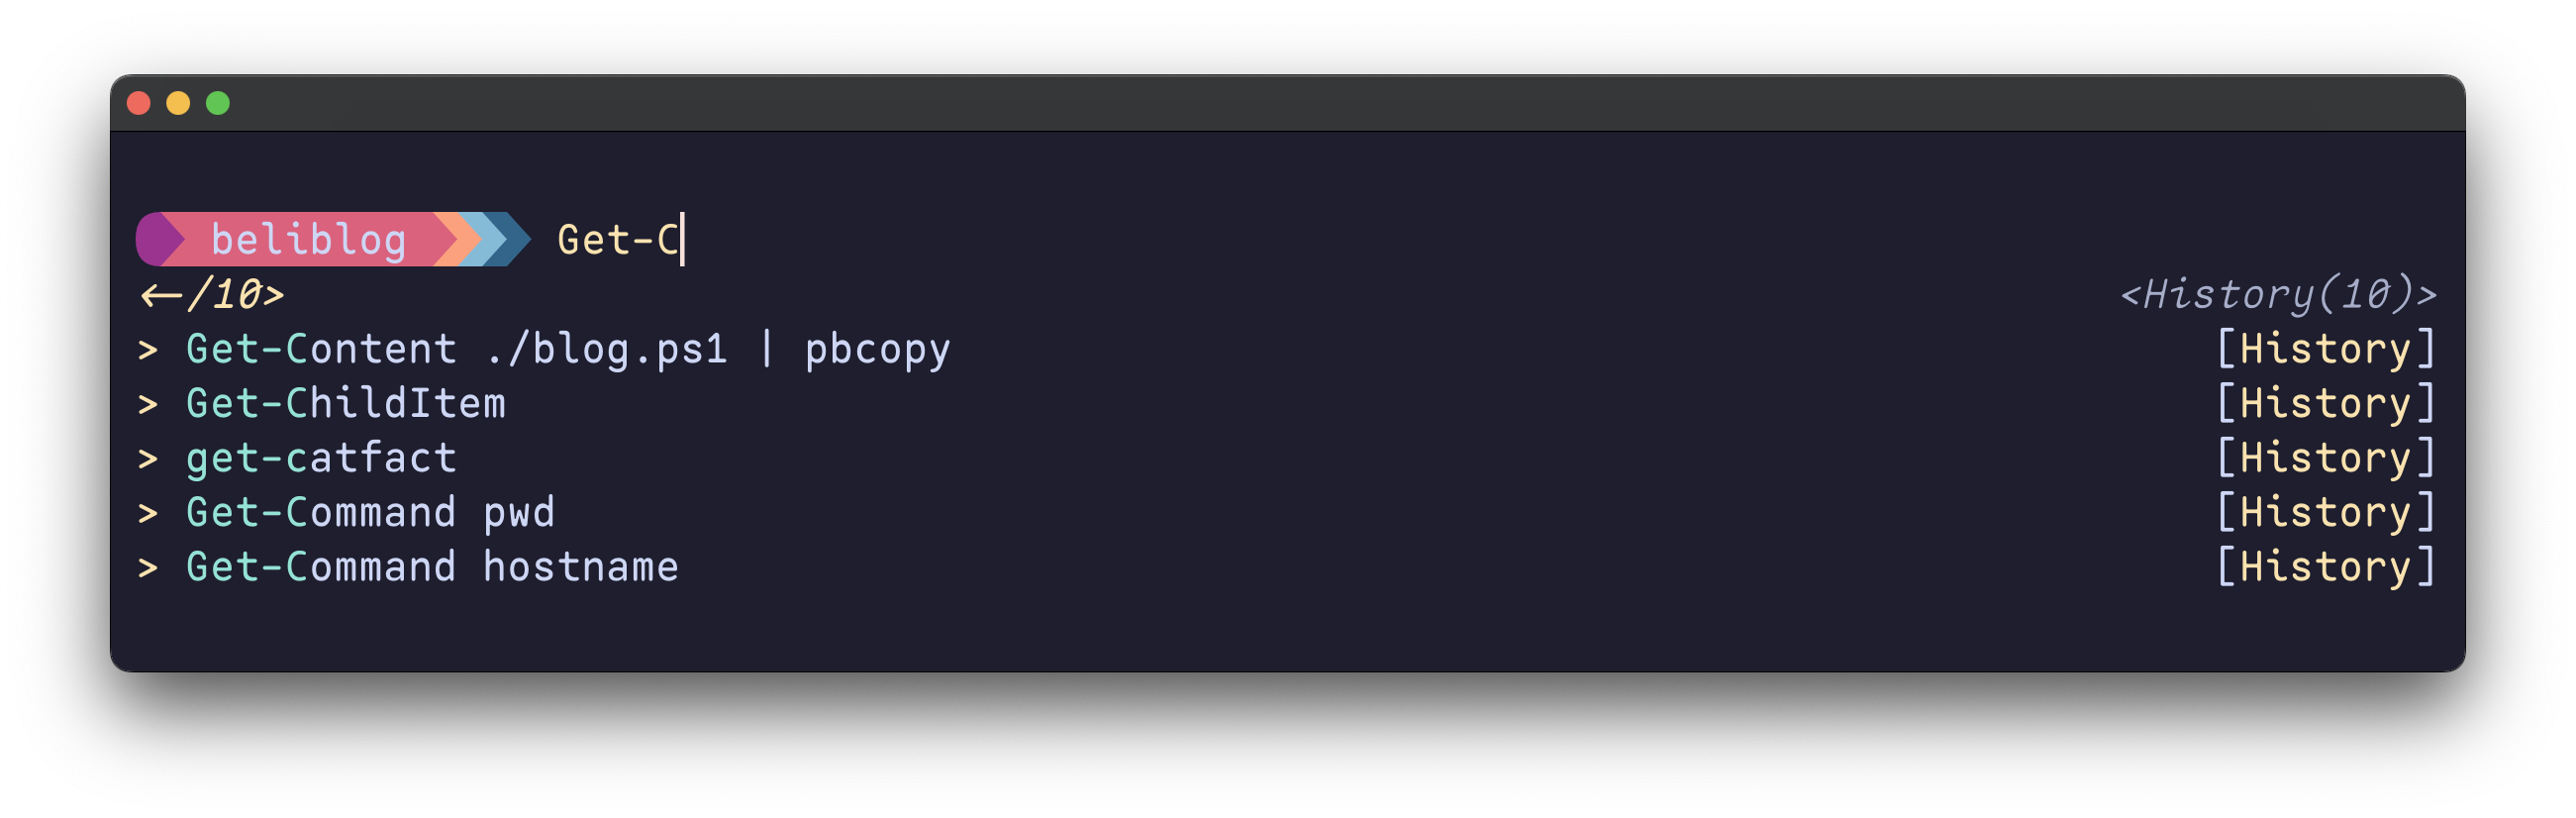
Take PSReadLine, for instance. It’s not just a minor upgrade; it completely transforms your console experience with enhanced tab completion and customizable keybindings. Once you’ve installed this powerhouse module, a simple configuration tweak unleashes its full potential: a list view prediction mode that blows the standard tab completion out of the water.
# Assuming you have PSReadline Module installed
Set-PSReadLineKeyHandler -Chord F2 -Function SwitchPredictionView
Set-PSReadLineOption -EditMode Vi
Screen-grab of psreadline prediction in list view. Source for prediction is history .
🔍 Completion for External Tools: Bridging the Gap
A growing number of command-line interface (CLI) tools now offer completion support for PowerShell. This is a major win for productivity, as it eliminates the need to constantly refer to help menus or external documentation. With tab completion, these external tools seamlessly integrate into your PowerShell workflow, feeling almost as intuitive as native commands.
Take the popular GitHub CLI, for instance. It’s a fantastic utility for interacting with GitHub repositories, issues, and pull requests right from your terminal. With completion support, you can effortlessly navigate its commands and options, making your Git-related tasks a breeze.
The GH-CLI comes with a built-in PowerShell completion script that you can access using gh completion --shell powershell. Integrating this script into your current terminal session is a straightforward process that unlocks tab completion for all the switches and parameters of the gh CLI tool.
# Add gh completion helper to profile
gh completion -s powershell | Out-String | Invoke-Expression
✨ Custom Functions: Sky is the limit
As you progress on your PowerShell journey, your collection of custom functions will inevitably flourish. Resist the temptation to simply copy and paste functions from other sources.
For instance I have a simple function called Copy-Content. This small yet handy command has saved me ton of keystrokes and tremendously improved my productivity.
function Copy-Content {
    param($Path)
    Get-Content $Path | Set-Clipboard
}
While you can certainly draw inspiration from others, let your own unique workflow and needs guide the growth of your function library.
🚀 Background Jobs: Supercharging without the Startup Lag
Here’s a productivity trick that might not be in the PowerShell playbook, but it’s a game-changer for me.
There are certain tasks you might want to run periodically or on demand, like updating modules or fetching configuration files from a remote source. The conventional wisdom often points to scheduled tasks, which certainly work but operate outside your shell’s cozy environment.
Since I practically live in the terminal, I prefer to set these tasks as background jobs directly within my PowerShell session. This allows me to manage and monitor them alongside my other PowerShell activities, keeping everything neatly centralized.
⚠️ Important Note: Running these tasks as background jobs is essential. If you execute them directly within your profile, your profile’s load time will skyrocket, forcing you to wait for the tasks to finish every time you launch a new PowerShell session. Nobody wants that!
Benefits of running it in profile and not as scheduled job
- It sits in
$PROFILEas PowerShell code so its easy to modify (and version control) - You can get status of the job at any point by running
Get-Job - On-Demand Execution, Trigger tasks manually by reloading your profile with
. $PROFILE. - Easy to manage and version control
This is how I update one of the module ModuleFast (an epic module by Justin Grote)
$sb = { Update-PSResource -Name ModuleFast }
Start-Job -ScriptBlock $sb -Name ProfileJob
This approach opens up a world of automation possibilities. You can delegate virtually any time-consuming task to your profile’s background jobs. I personally have an army of jobs working tirelessly behind the scenes, handling tasks like cleaning temp directory, Fetching Git Projects, Upgrading Modules and more.
🎁 Wrapping Up
I have briefly explained each profile component and its role in improving Profile
This is just the beginning! In Part 2, we’ll tackle profile management, organization, conditional loading and advanced techniques. Get ready to elevate your PowerShell game to the next level and make your shell truly your own.